The last few decades have seen arts, music, and drama classes fall by the wayside. But as our economy continues to grow and change in unprecedented ways, our students need to learn how to think creatively more than ever. So, how can educators teach creativity in a way that drives students toward other practical skills?
The answer is makerspaces. As a hands-on, collaborative learning tool, makerspaces can help guide students to careers in engineering, architecture, science, technology, robotics, and all the humanities. Creativity is an imperative and crucial skill set, and a makerspace can be the key to unlock students’ potential.
Let’s take a look at what makerspaces are and how you can integrate them in your school library.
What Are Makerspaces?
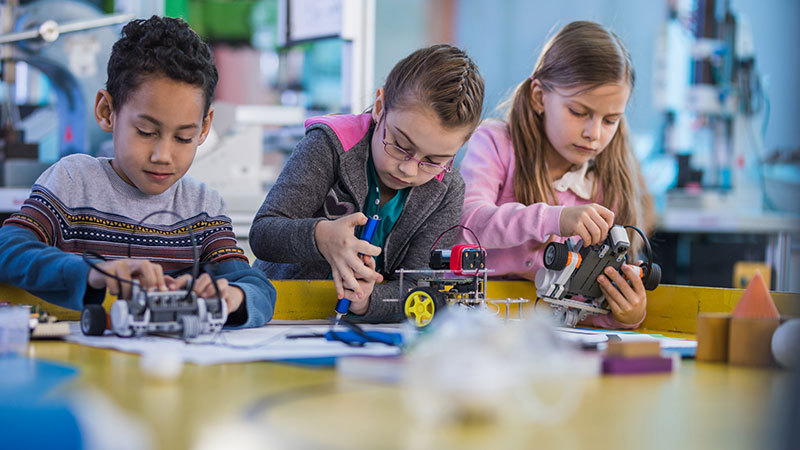
According to Makerspaces.com, makerspaces are hands-on activities that prompt students to collaborate and participate in a more unconventional, out-of-the-box style of learning. The level of technology in a makerspace can vary from state-of-the-art learning technology to simple art supplies. You can use things as simple as Legos, cardboard, and scissors, or you can integrate technology such as 3-D printers, computers, soldering tools, and sewing machines to instill different skill sets in your students.
The sophistication of the tools should not determine the effectiveness of a makerspace. The most important quality is its ability to engage students in project-based learning in creative ways. Students should feel empowered to express themselves and learn how to solve problems with physical and digital tools.
Because makerspaces are unconventional activities, they typically aren’t evaluated. This means that students can engage in this nontraditional learning style without the pressure of being graded. As a result, students can much more easily and readily express their creative ideas.
Makerspaces in School Libraries: The Benefits
A library doesn’t have to exclusively be a quiet place of independent learning. Parts of it can be interactive, loud, and collaborative makerspaces where you can promote creativity through project-based learning.
Makerspaces help students think about libraries in a different way. Libraries exist to prompt learning for students of all ages, so the sooner they get excited about these kinds of spaces, the sooner they will begin feeling comfortable and confident in a potentially unorthodox learning environment. If students associate libraries with fun and creative experiences, they’ll be more likely to use library services in the future.
The School Library Journal wrote that makerspaces can stimulate critical thinking and enhance emotional intelligence to help motivate students to explore new academic experiences. They also feature seven stark benefits that a makerspace can bring to a school library, including:
- A focus on the present
- Time dedicated to learning through physical activity
- The opportunity to think critically and independently
- A hands-on approach to problem-solving
- A major mood booster
- The foundation for a new school community
- The motivation to repurpose and recycle materials
Ideas for Your Makerspaces
You don’t need advanced technology to make great makerspaces. You can use everyday objects to capture your students’ interest and inspire them to participate in unconventional learning activities. Here are two makerspace activities you can easily offer in your library.
Making Costumes
A good start to get students excited about makerspaces is a costume-making activity. This project can be as simple or complex as you want to make it. For example, leading up to Mardi Gras, you could have students make and decorate their own masks made of fabric or construction paper. Measuring and cutting out their own masks will engage them in geometrical ideas such as symmetry and 2D vs. 3D shapes, while also letting students express themselves creatively.
If you wanted to do a bigger project, you could have students design an entire costume. You can connect it to Halloween or use a theme such as superheroes or a certain historical period. First, students should design their costume, either on paper or using a computer program. Then, they have to take measurements, figure out how much fabric or other materials they need based on those measurements, and sew or otherwise assemble their costumes. This activity can tap into a variety of different practical and mathematical skill sets while allowing students’ creativity and individual personalities to shine.
Building a Car
A more advanced, science-focused project would be building a battery-powered mini car, like this one from Makerspaces.com. Note that this project involves a hot glue gun and an X-Acto knife, so students may require additional supervision. Here’s what you’ll need for supplies:
- A small cardboard box (e.g., a cake mix box)
- Two AA batteries
- A battery holder
- Four bottle caps
- A switch
- A DC motor
- Two straws
- Two small plastic pulleys
- A rubber band
- Wooden skewers
- Scissors
- Wire cutters or strippers
- A hot glue gun
- An X-Acto or craft knife
Steps for building an electric car:
- Cut a large, identical opening toward the front third of the box (where the front wheels will go).
- Glue the straws across one side of the box. The straws should stick out some on either side.
- Cut out about an inch from the middle of the front straw.
- Drill or pierce holes in the middle of the four bottle caps and one of the pulleys.
- Insert the small wooden skewers into the straws to act as axles. As you insert the front axle, run it through the pulley and the rubber band in the middle where you cut the hole in the straw.
- Glue the pulley in place in the middle of the front axle.
- Attach the bottle caps to the skewers and glue them with a hot glue gun.
- Glue the battery holder to the top of the car (i.e., the opposite side of the box from the wheels).
- Place the other pulley onto the shaft of the DC motor.
- Glue the motor near the double AA battery holder.
- Wire the motor to the double AA battery holder.
- Connect the switch to the double AA battery holder.
- Use the rubber band to connect the pulley on the motor to the pulley on the front axle.
You can take this activity one step further by having students decorate their cars after they build them.


